Step by Step
Pro Faux Quarry Stone
Greg Frohnapfel demonstrates the step-by-step process of applying ProFaux Quarry Stone. The newest “green” product by ProFaux will amaze you with its easy application and attractive finishing. When you require natural stone effects identical to the real thing, try Quarry Stone. It can be applied for both interior and exterior projects as it is resistant to water yet remains very breathable as a coating.
Materials List:
• Diamond Tooth Primer
• ProFaux Quarry Stone
• Stainless Steel Trowel and/or 1/2′ Roller,
• ProFaux Stonewash Pigments
• ProFaux OpenTime Glaze™
• 1/4″ Tape
• Knock Down Blade
• Cellulose Sponge
• 2″ Sash Brush
• Stir Stick
• Bucket or Tray
Application Method:
Use Diamond Tooth Primer to seal the substrate. If the surface is porous, dilute the primer with 10% water for better penetration. Allow overnight drying.
1. Use universal colorant to tint the Quarry Stone to a color of your choice ( Remember the 5% maximum tint rule- do not exceed 5% by volume. For example, do not add more than 6.4 ounces of universal colorant per gallon of Quarry Stone.) Quarry Stone may also be tinted with latex paint but this is a weaker tinting method.
2. Fill a paint tray with the tinted Quarry Stone. Use a ½” nap roller, 2” sash brush and a stainless steel trowel to apply and further manipulate.
3. Choose an application method suited to your project, keeping in mind that a roller is faster but that a trowel will give you more control. Once a section is rolled out, a light pressure with the roller will create nice peaks. These peaks can be knocked down with either the ProFaux knockdown blade or the Magic Trowel.
The trowel will give a controlled texture which will need a pumping action to achieve a peaked texture. When flattening the texture it is important to time the action so each area is the same. The amount of time you allow the texture to dry will dictate the best type of knockdown tool to use. For a very short drying time, say less than 5 minutes, try the lightweight ProFaux knockdown blade. For 5-10 minutes of drying you may like the Magic Trowel. For longer periods, when the surface looks half dry, a plastic float may be the right tool to flatten the texture.
4. Mask with ¼” tape.
5. Trowel Quarry Stone thinly over the tapes.
6. Mix Open-Time Glaze with choice of universal colorants or create a wash with water and ProFaux Stonewash Pigments. Apply with sponge. You can modify application by dabbing surface with damp cloth to remove glaze or wash. Remove tape after Quarry Stone is glazed and dry. Burnish surface for added depth and interest.
Variations on a theme.
First alternative method: Random (irregular) or regular (symmetrical) stone blocking in any size. Look at reference materials online or better yet look at real stone blocks on public buildings to recreate actual construction methods. This includes decorative features like key stones, arches, niches, windows and cornices. Hint: Never try to calculate random stone. Its random therefore has no organized layout. We recommend starting in the middle of the wall and working towards the edges without measurement.
Second alternative method: Apply the texture by trowel leaving ridges in a regular pattern. These ridges can be knocked back with a Magic trowel to produce a rustic plaster resembling old Tuscan facades, a popular finish with designers.
When dry, this plaster finish can be washed with a tinted glaze, giving an authentic aged effect.
Tip from Greg: If you brush the wash in two or more colors, try using a lighter color first and allow it to dry completely. Then randomly brush the other color(s) leaving open areas and use the brush to soften the washed edges.
Application: Thickness does affect the Quarry Stone products. Thicker applications will take longer to dry and may reveal cracking. May be applied with tools such as a spatula and trowel. Coverage: Varies widely depending upon application method: 50-150 sq.ft. per gallon.
Drying Time: Allow 2-4 hours to overnight, depending on film thickness (68 degrees @ 65% RH).
Clean Up & Disposal: Use hot water for application equipment. Do not dispose of any product in sewers, waterways or municipal garbage. Allow waste product to harden before disposal. If liquid disposal is necessary, contact your local municipality or paint store for instructions.
Here are the steps!

Step 1-2: Use universal colorants to tint the Quarry Stone to the desired color. Fill a paint tray with the tinted Quarry Stone. Use a ½” nap roller, 2” sash brush and a stainless steel trowel to apply and further manipulate.


Step 3: Choose an application method suited to your project, keeping in mind that a roller is faster but that a trowel will
give you more control. Once a section is rolled out, a light pressure with the roller will create nice peaks.


Step 3 (Continued): The peaks can be knocked down with either a knockdown blade or Magic Trowel.

Step 4: Mask with 1/4″ Tape.

Step 5-6: Trowel thinly over the tapes. Mix Open-Time Glaze with choice of universal colorants or Stonewash Pigments. Apply with Sponge.

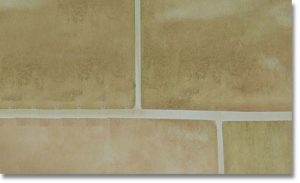
Step 6: Remove tape after the Quarry Stone is glazed and dry. Burnish for added depth and interest.
